Overview: Installing cPHULK on your dedicated server, you will have new security features. The ability to block (blacklist) or allow (whitelist) IP Addresses from accessing your server is a great feature. You can stop known threats or let known users connect to the server. In this blog we will show you how to blacklist and Whitelist IP Address in WHM.
NOTE: You need root access to your server to complete this process.
Here are the simple basic steps to Blacklist/Whitelist IP Address in WHM.
Blacklist IP Address:
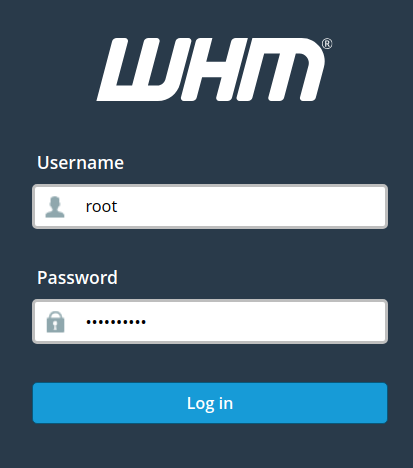
Step-1: Login to WHM as the username and password.

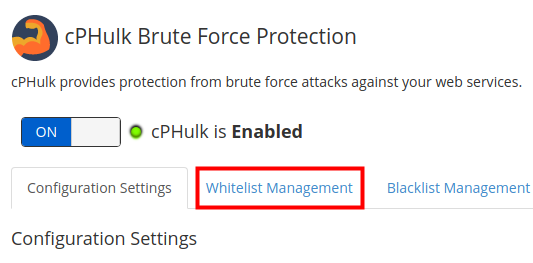
Step-2: Next type “cphulk” in the search box, then click on the cPhulk Brute Force Protection link in the security center section.

Step-3: Next click on the Blacklist Management tab.

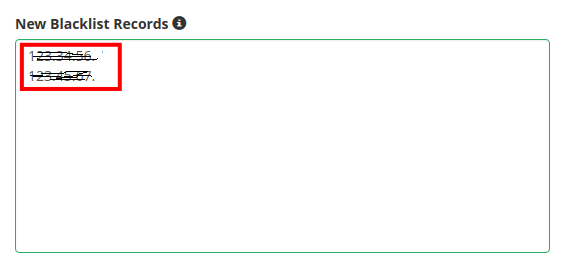
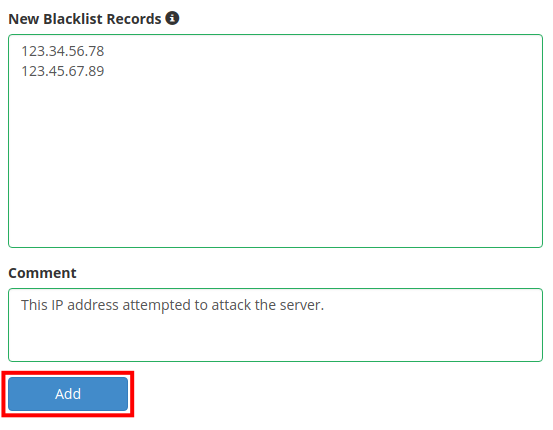
Step-4: Enter the IP address you want to blacklist. Each address should be on a new line.
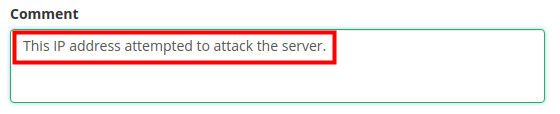
Step-5: If you want to add a note enter in the Comment section.
Step-6: Click the Add button to blacklist these address
You will then see a success message.

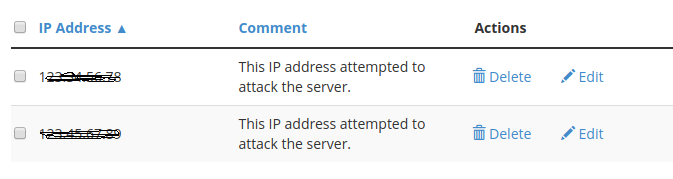
Step-7: The IP addresses you added will now be listed along with the comment you entered.
Now that you know how to blacklist an IP address in WHM using cPHulk, we will now you you how to whitelist an IP address.
Whitelist IP Address:
Step-1: Login to WHM with username and password.
Step-2: Next type “cphulk” in the search box, then click on the cPhulk Brute Force Protection link in the security center section.

Step-3: Next click on the Whitelist Management.
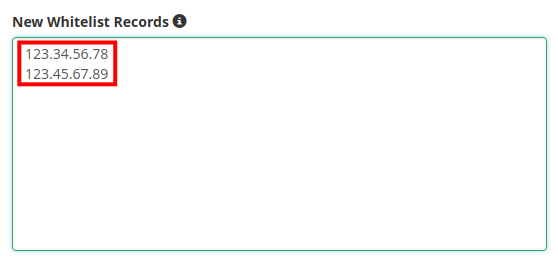
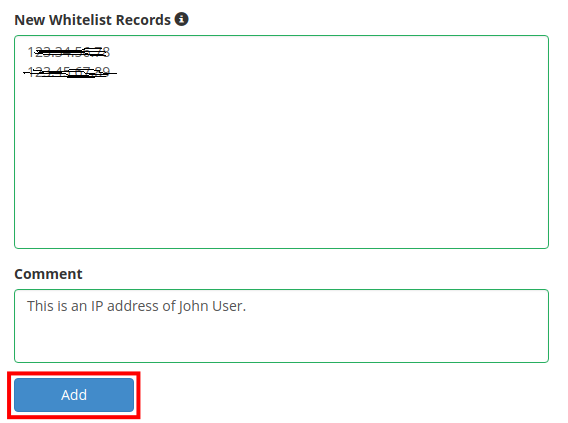
Step-4: Enter the IP address you want to Whitelist. Each address should be on a different line
Step-5: Enter a comment if you want to add it to the whitelist record.
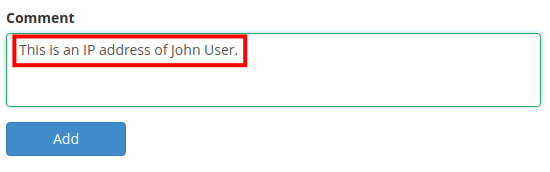
Step-6: Click on the Add button to add the IP address to the whitelist.
Step-7: You will see the Whitelisted IP Address listed.

After following these steps you have successfully Blacklist/whitelist IP Address in WHM.
